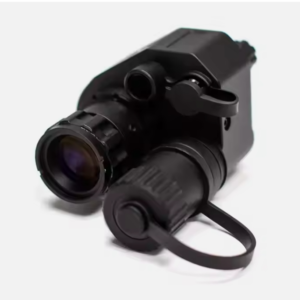
- Battery installation
Unscrew the battery cover and use a flat-head 18650 lithium-ion rechargeable battery with a rated voltage of 3.7v. Install it with the positive pole facing in.
Please make sure the battery cover is tightened.
2. Picatinny Mount installation
There are multiple screw holes under the night vision device. Use a hexagonal wrench to fix the guide rail as needed. The position of the mount can be adjusted appropriately through the screws. The picatinny mount provided is suitable for many types of rails.
- The Eyepiece Dioptre Adjustment
Eyepiece focusing, also known as diopter adjustment, aims to enable users with different eyesight to clearly see the display screen. Turn the focus ring so that your eyes can clearly see the text icons in the four corners of the screen.
Please note: This does not mean that the image can be clearly seen after adjustment. This step is just to ensure that the four-corner icons on the display can be clearly seen.
- The Objective Lens Adjustment
Once the dioptre adjustment is completed, aim the device at your target and adjust the objective lens ring until you get a clear and focused image.
- IR illuminator adjustment
Under the black and white or green mode, short press the navigation UP button to adjust the IR light level (IR Levels 1-5 are available), or you can focus the fill light by rotating and stretching the IR illuminator housing.
- Red Dot Adjustment
Long press the Menu button to activate the laser red dot. The position of laser can be adjusted with the laser adjustment holes using the provided hex-nut wrench.